
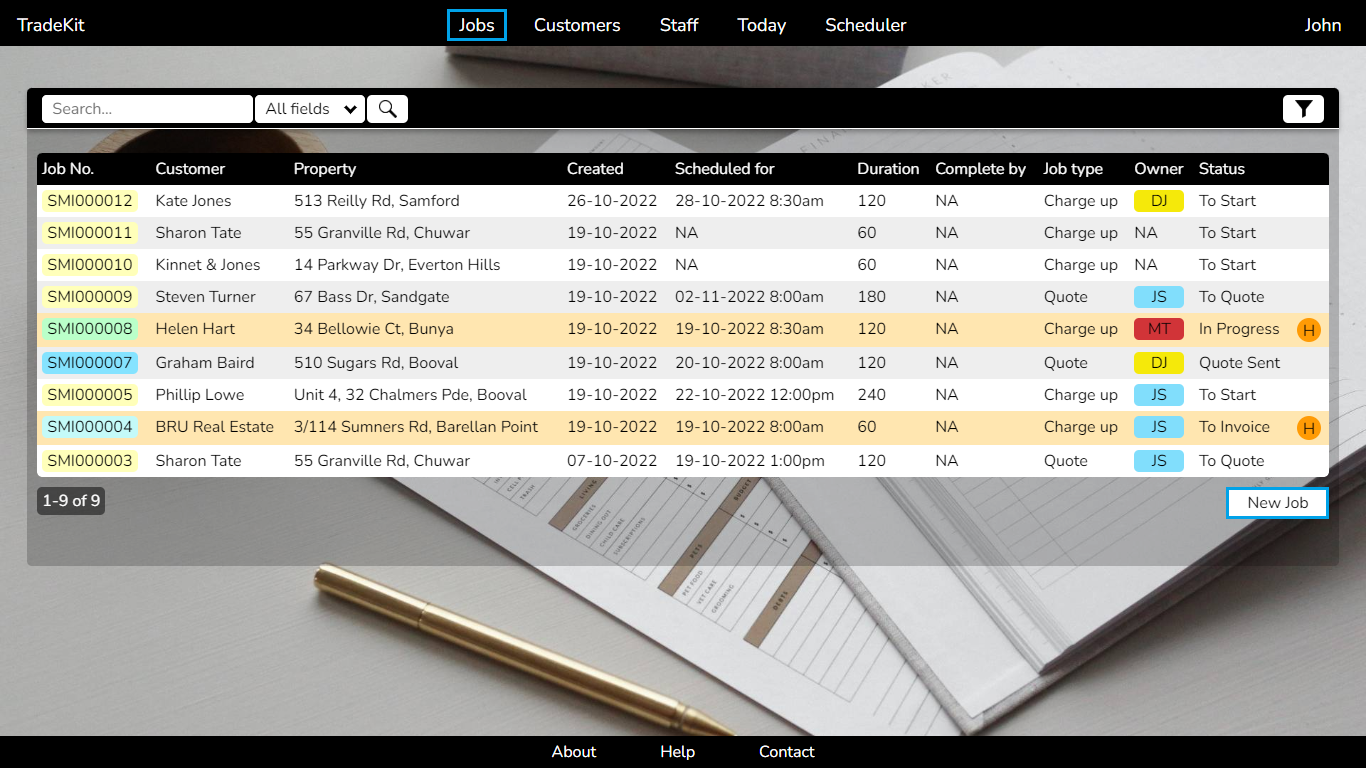
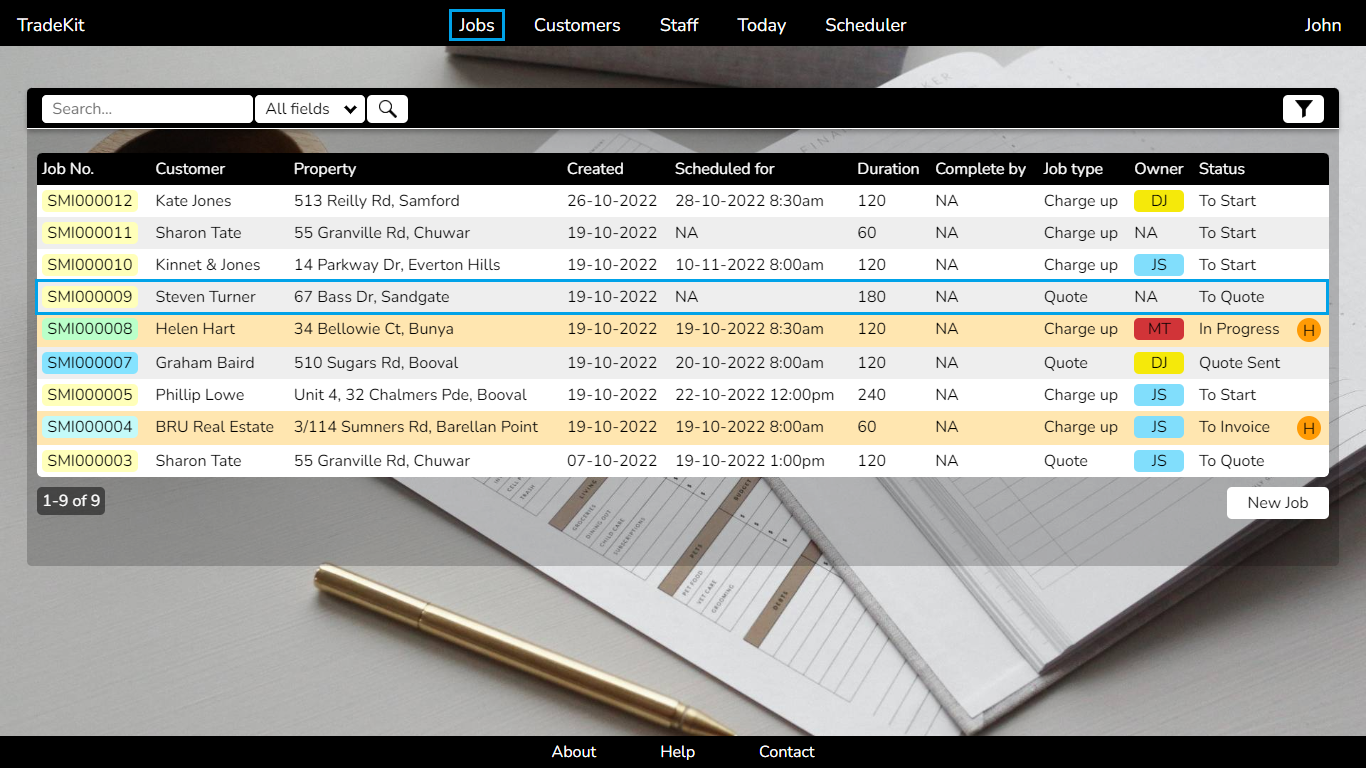
Creating jobs >
To create a new job:
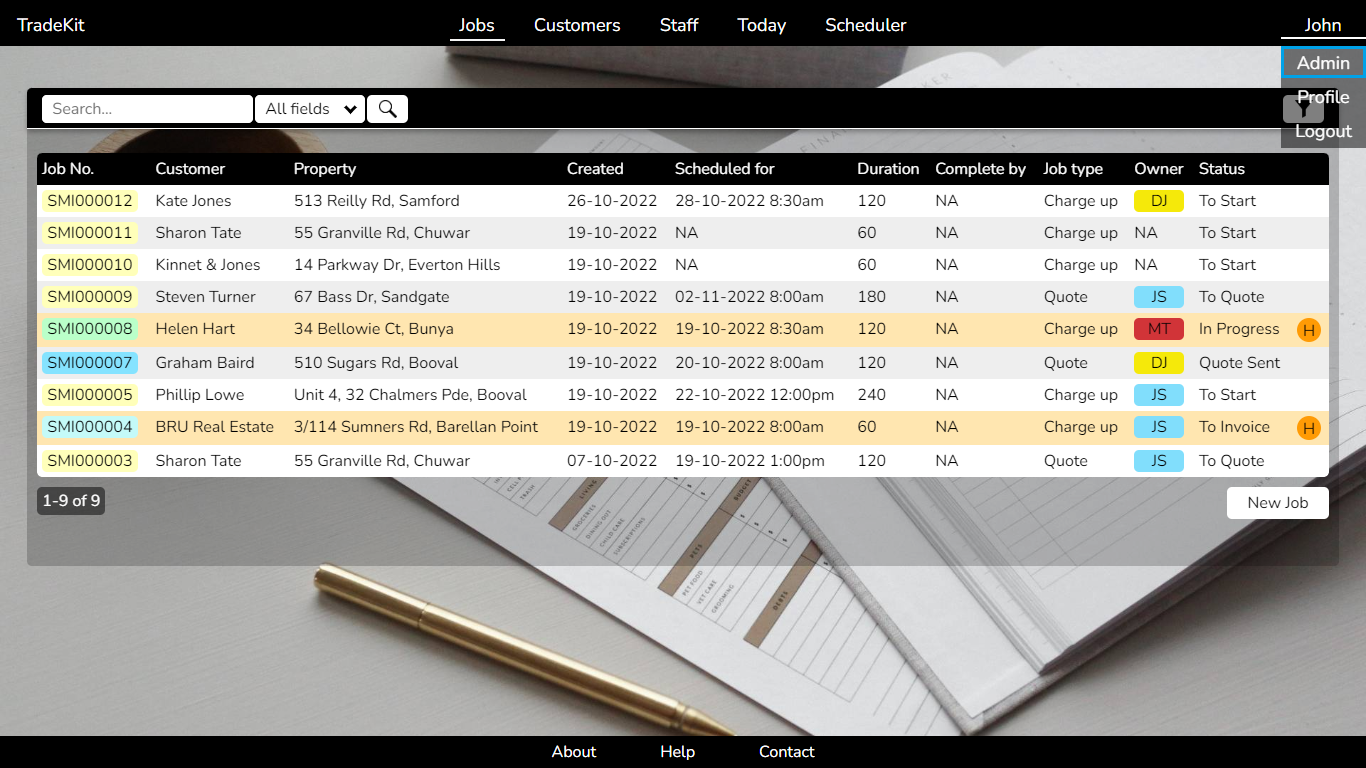
- Click 'Jobs' from the main menu.
-
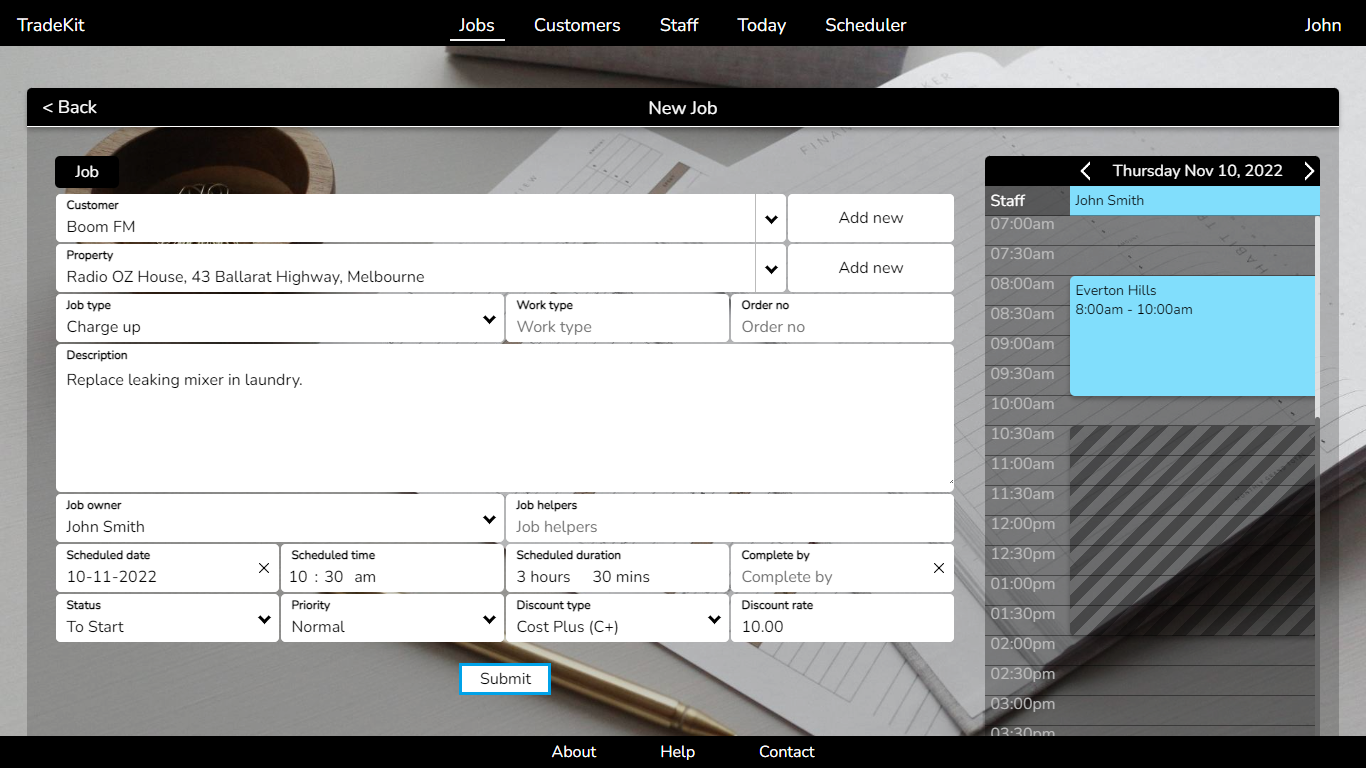
Click 'New Job'.
- Search for an existing 'Customer' (results will be displayed as you type), or click 'Add new'.
-
Search for an existing 'Property' (results will be displayed as you type), or click 'Add new'.

- Make sure the correct 'Job type' is selected - 'Charge up' for invoices or 'Quote'.
- Enter a 'Description' of the work to be performed.
- If you're ready to schedule the job in, select a 'Job owner' and 'Scheduled date'. This will display the team member's current schedule along with the tentative schedule for this job.
- Adjust the 'Scheduled time' and 'Duration' as required.
- If the job is urgent, change the 'Priority' to 'High'.
-
When finished click 'Submit'.
Adding customers >
Customers added to TradeKit are automatically added to your contacts list in Xero. Business owners can also import all existing Xero contacts into TradeKit when first configuring their TradeKit account.
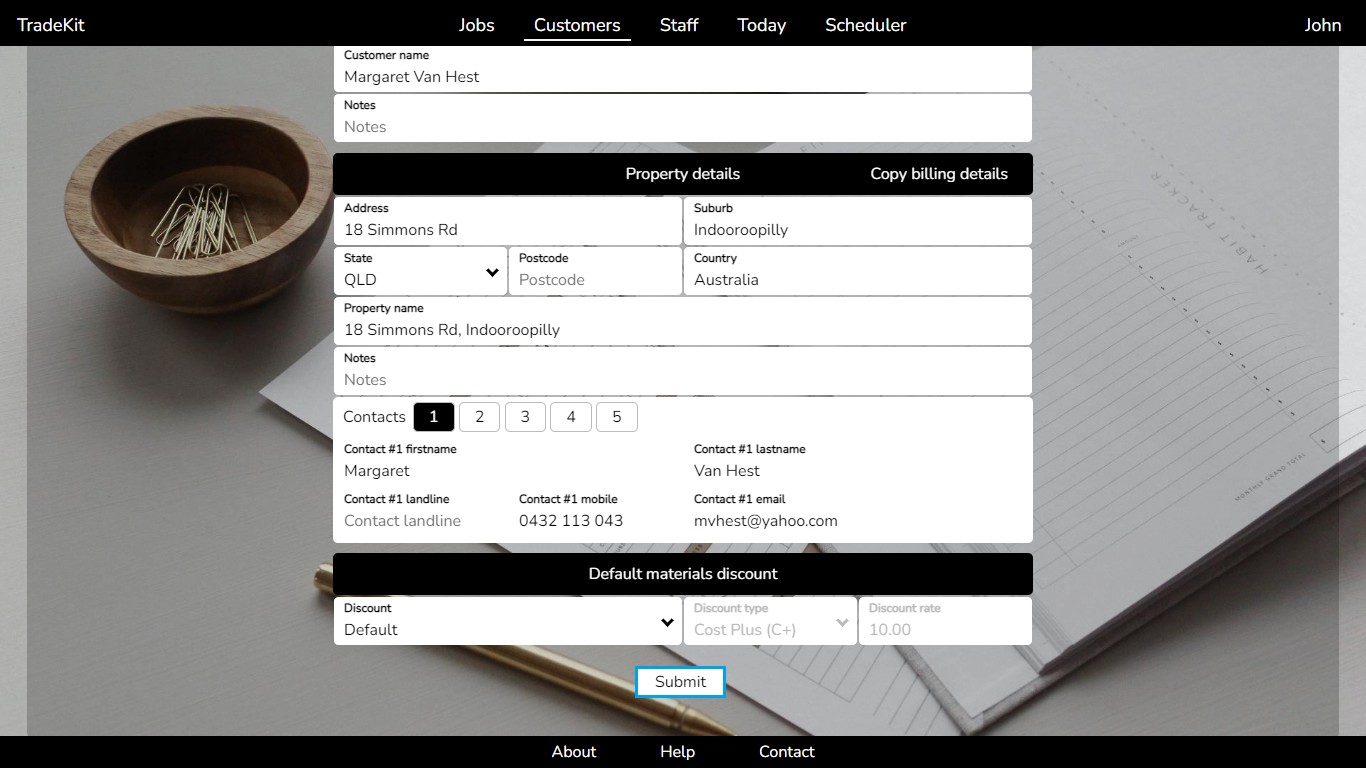
To add a new customer:
- Click 'Customers' from the main menu.
-
Click 'New Customer'.
- Enter in the customer's billing details - these will be used when quoting or invoicing in Xero.
-
Click 'Copy billing details' to auto populate the customer's property details.
Tip: Up to 5 contacts can be added for each property.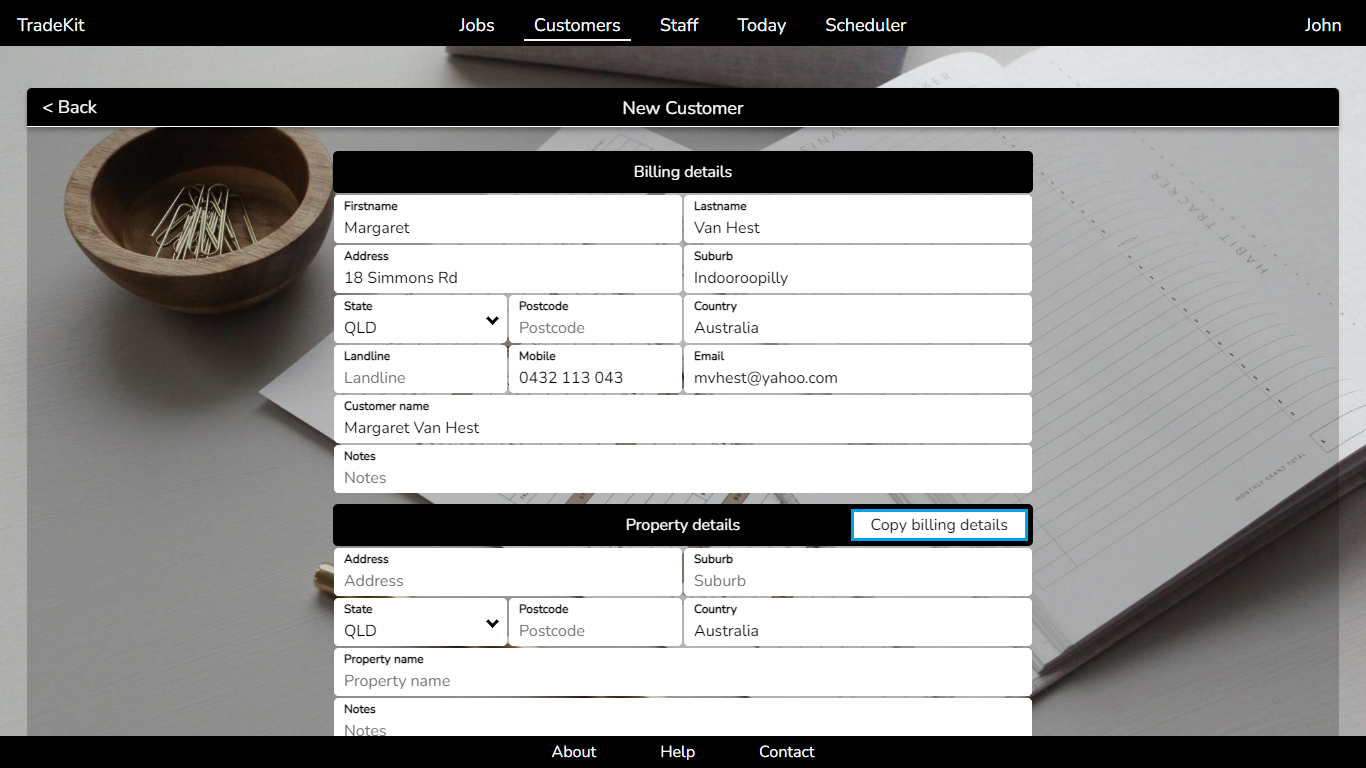
- Adjust the 'Default materials discount' if required.
-
When finished click 'Submit'.
Scheduling jobs >
Jobs can be scheduled on an individual basis, or they can be scheduled using the Scheduler. The Scheduler has the advantage of showing the schedules of all your team members for a given day or week.
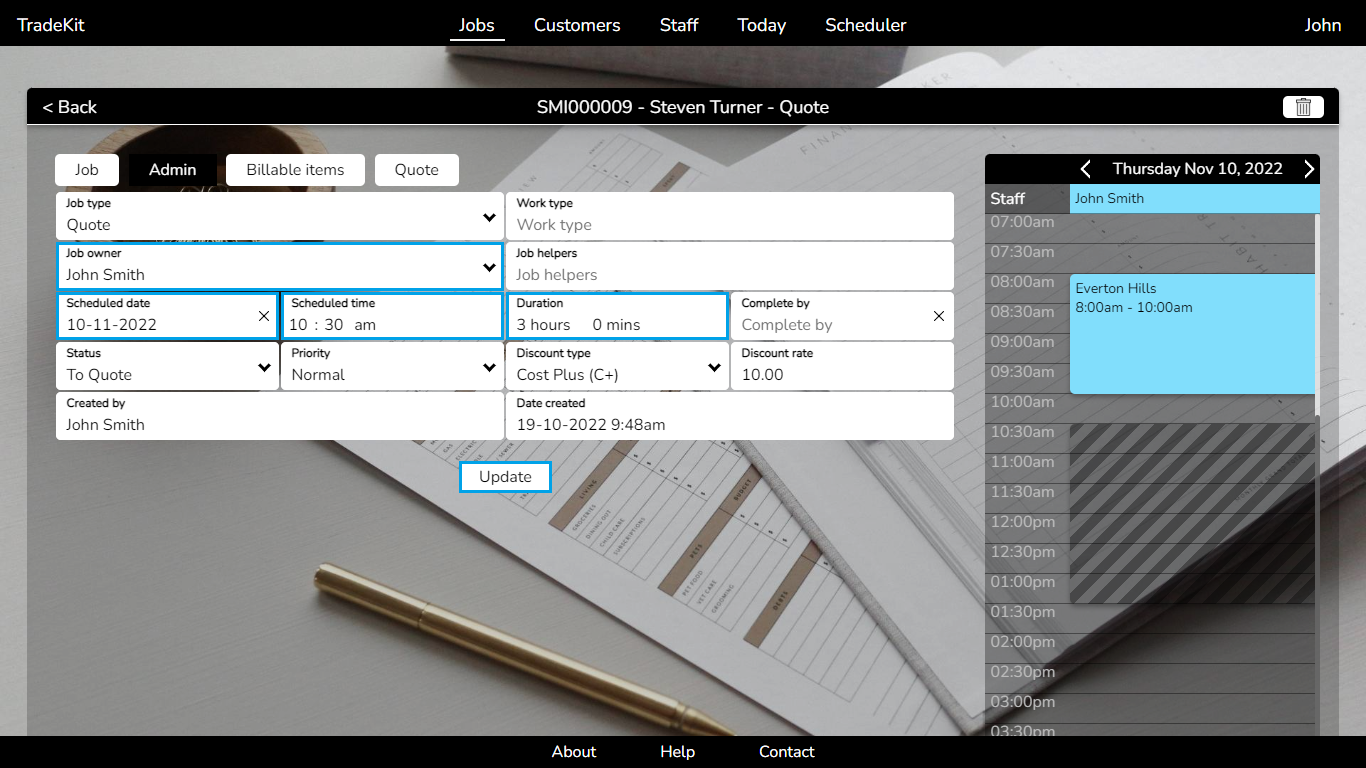
To schedule an individual job:
- Click 'Jobs' from the main menu.
-
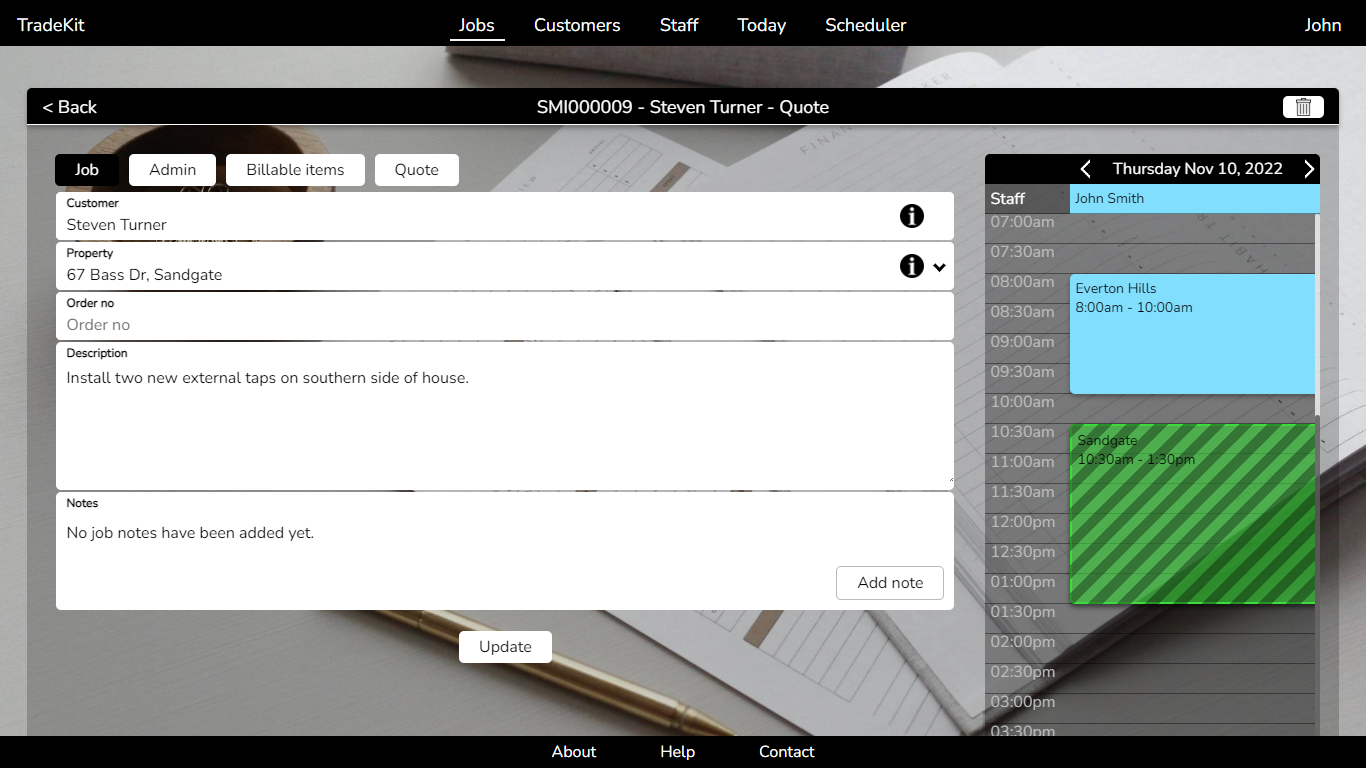
Click on the appropriate job and then click 'Admin'.
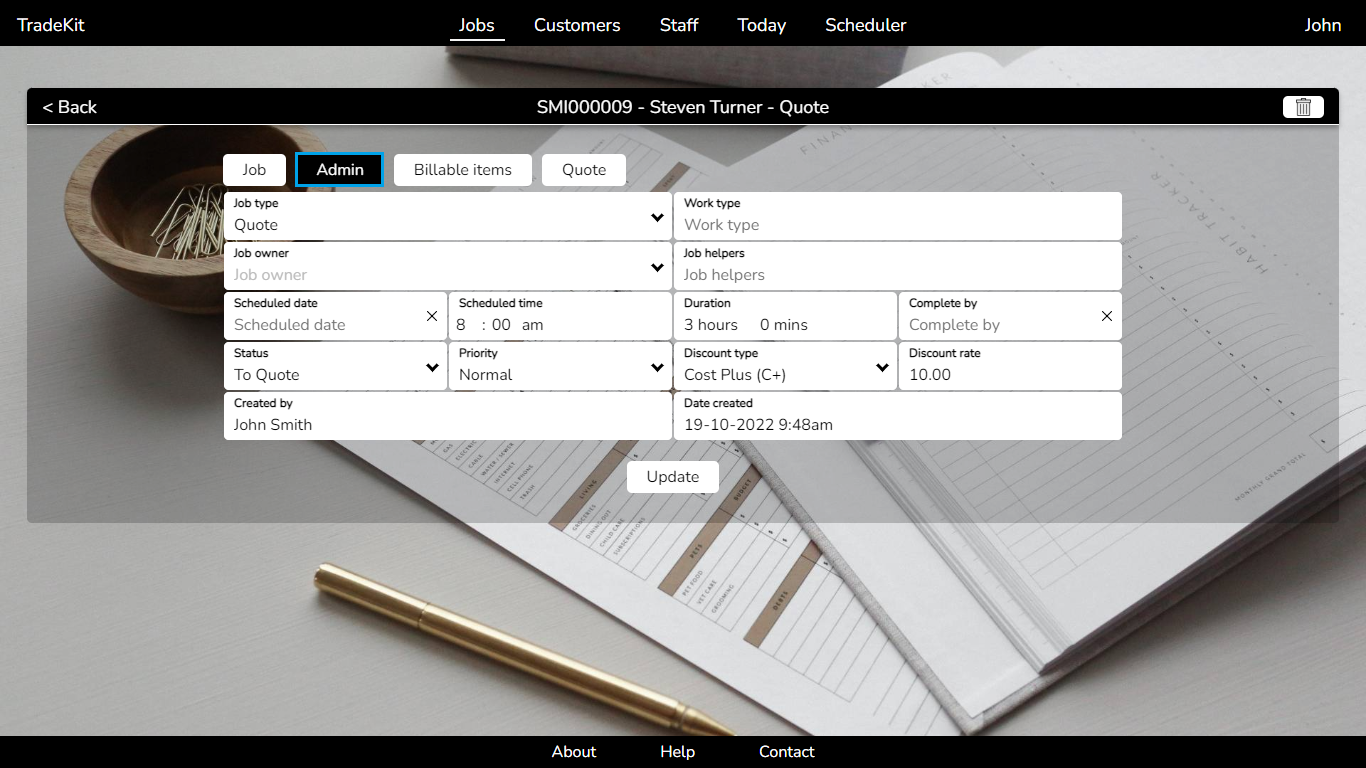
- Select the appropriate 'Job owner' and enter a 'Scheduled date'. This will display the team member's current schedule along with the tentative schedule for this job.
- Adjust the 'Scheduled time' and 'Duration' as required.
-
When finished click 'Update'.
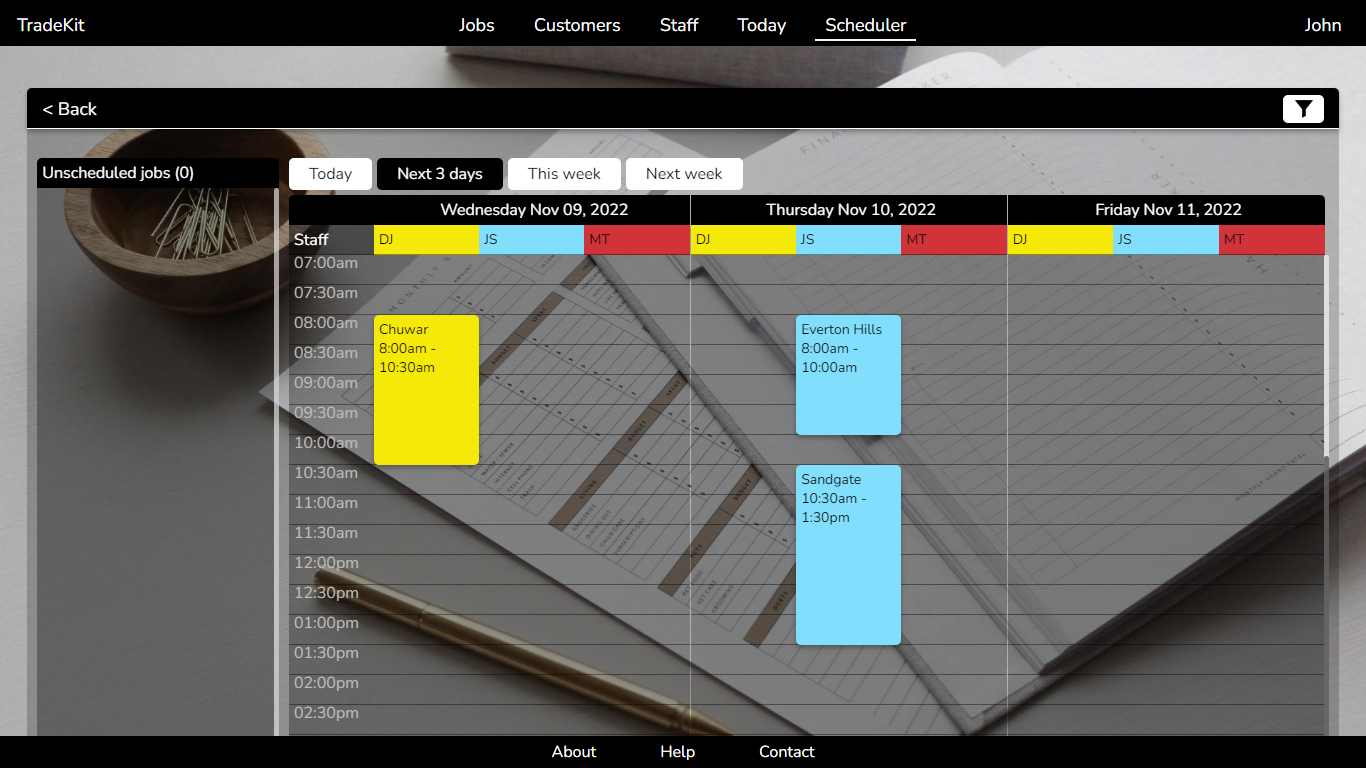
To schedule jobs using the Scheduler:
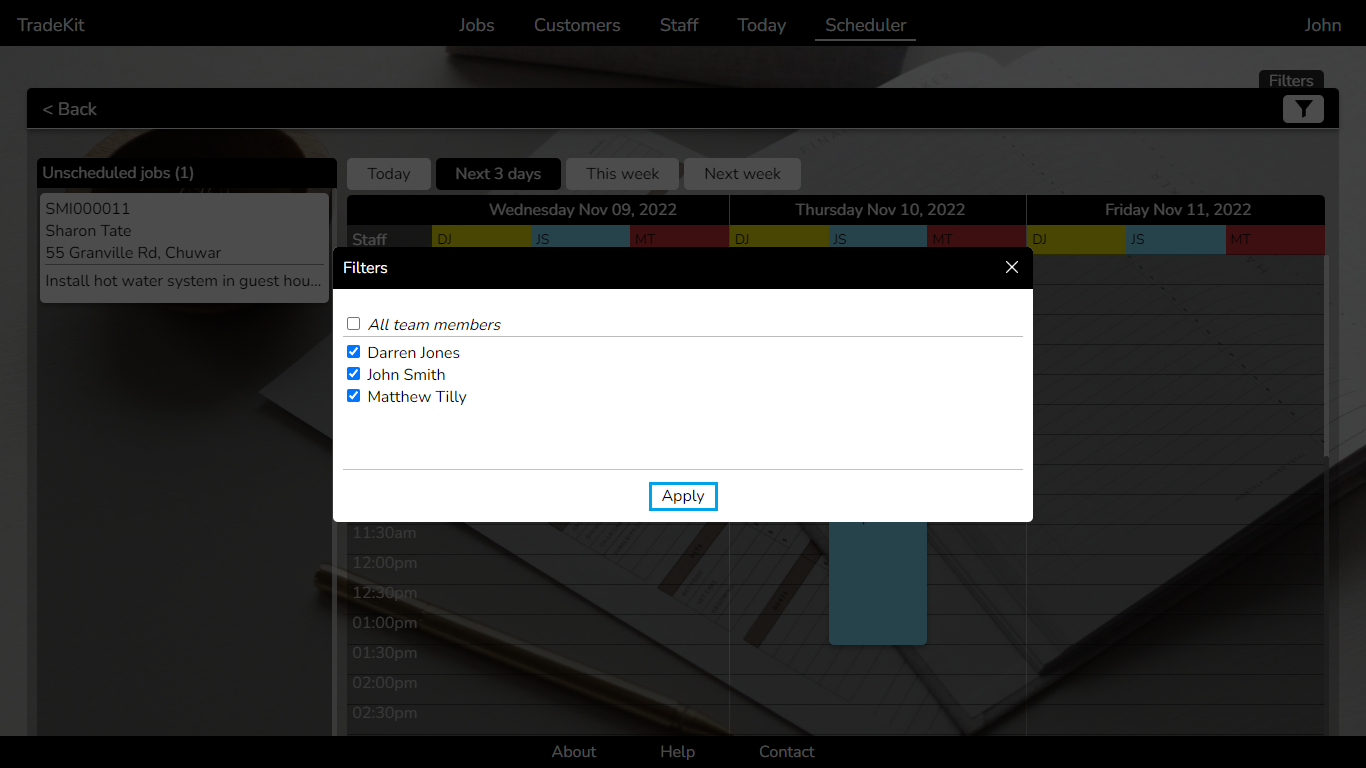
- Click 'Scheduler' from the main menu.
- Adjust the viewing time period as required.
-
Optionally, click the filters icon to show or hide schedules for particular team members.

- To schedule an unassigned job, click the job and then select a 'Job owner', 'Scheduled date', 'Scheduled time' and 'Duration'.
-
When finished click 'Submit'.

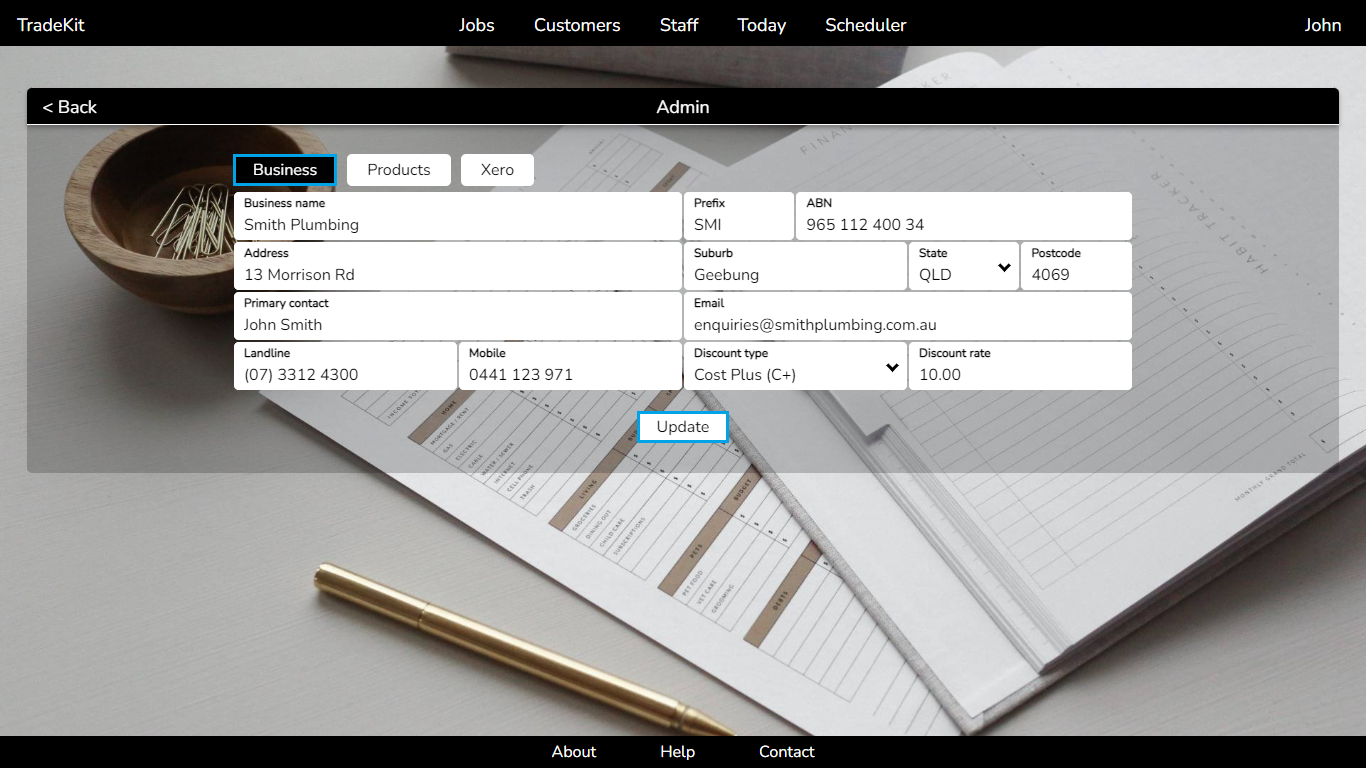
Configuring your business settings >
Before getting started it is recommended that some basic account settings be configured. To configure your account:
- Hover over the account menu and click 'Admin'.
- Select the 'Business' tab.
- Update the 'Prefix' field which determines the invoice number as it appears in Xero. E.g. a prefix of 'KPG' will result in Xero invoice numbers 'KPGXXXXXX'.
- Adjust the default 'Discount type' and 'Discount rate' which is used as the default value when new customers are created in TradeKit, or imported from Xero.
-
When finished click 'Update'.
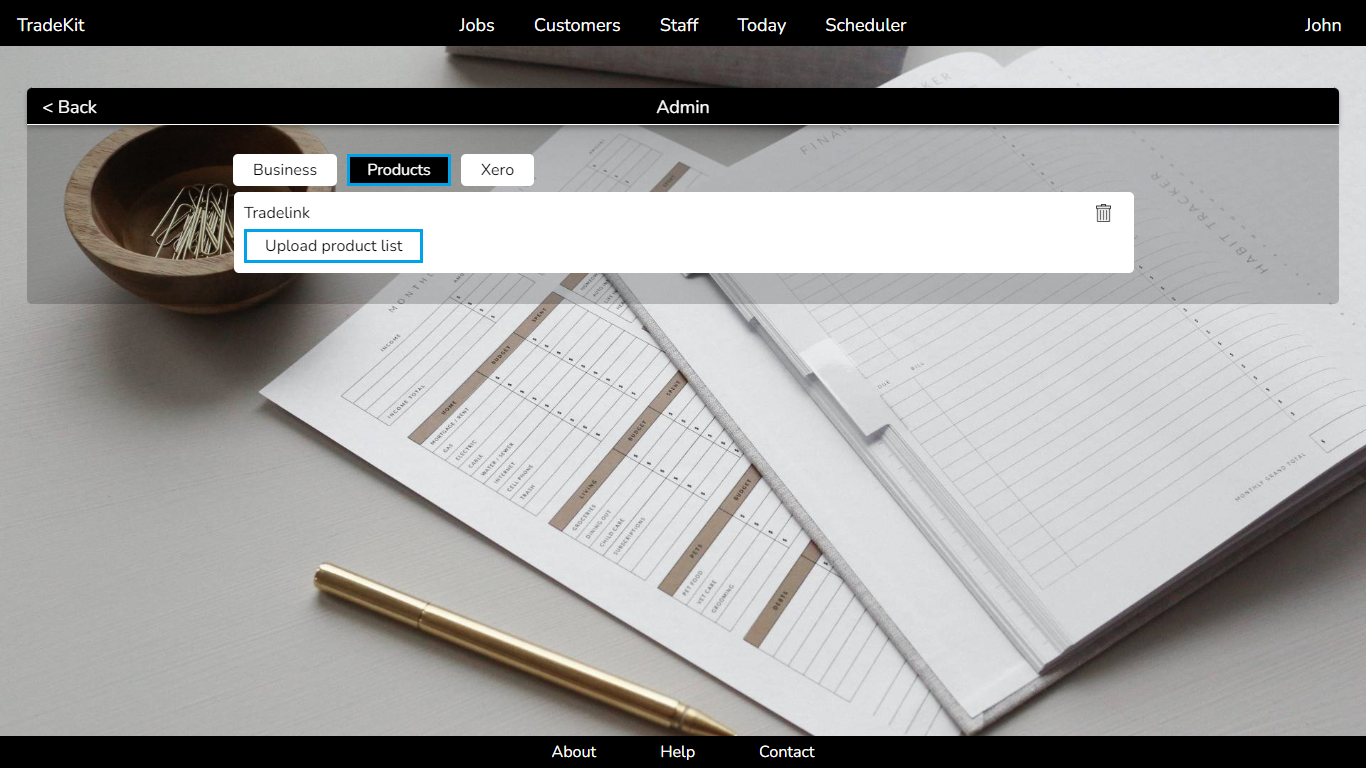
Uploading supplier product lists >
Supplier product lists can be uploaded to your TradeKit account, allowing you to then add items from those product lists to a given job. All product lists are supported provided they are in CSV (Excel) format.
To upload a new product list:
- Hover over the account menu and click 'Admin'.
-
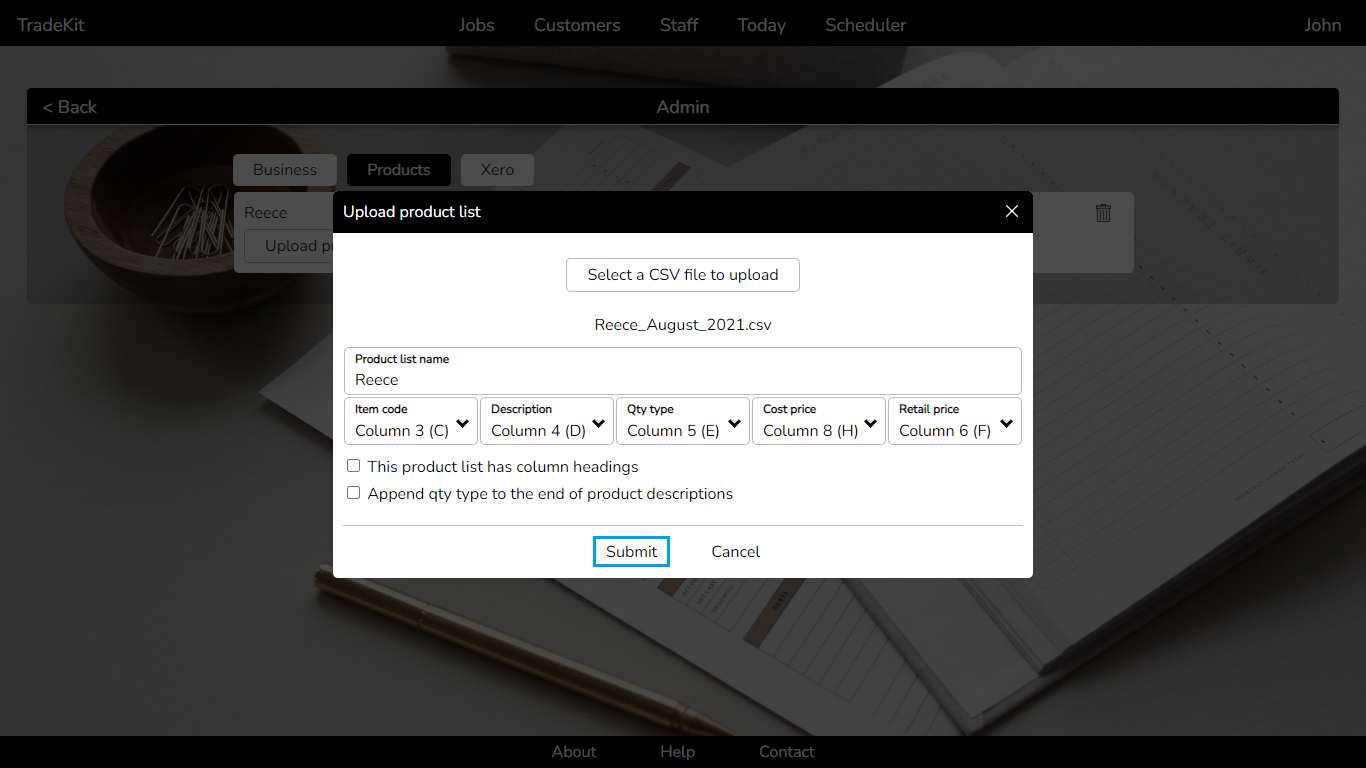
Select the 'Products' tab and then click 'Upload product list'.
- Click 'Select a CSV file to upload' and select the appropriate file.
- Enter a 'Product list name' - this will be shown when searching for items from the product list.
-
Adjust the 'Item code', 'Description', 'Qty type', 'Cost price', and 'Retail price' column numbers to match the CSV file you are uploading. For example if the product 'Description' is the third column in your CSV file (column C in Excel), set it to 'Column 3'.
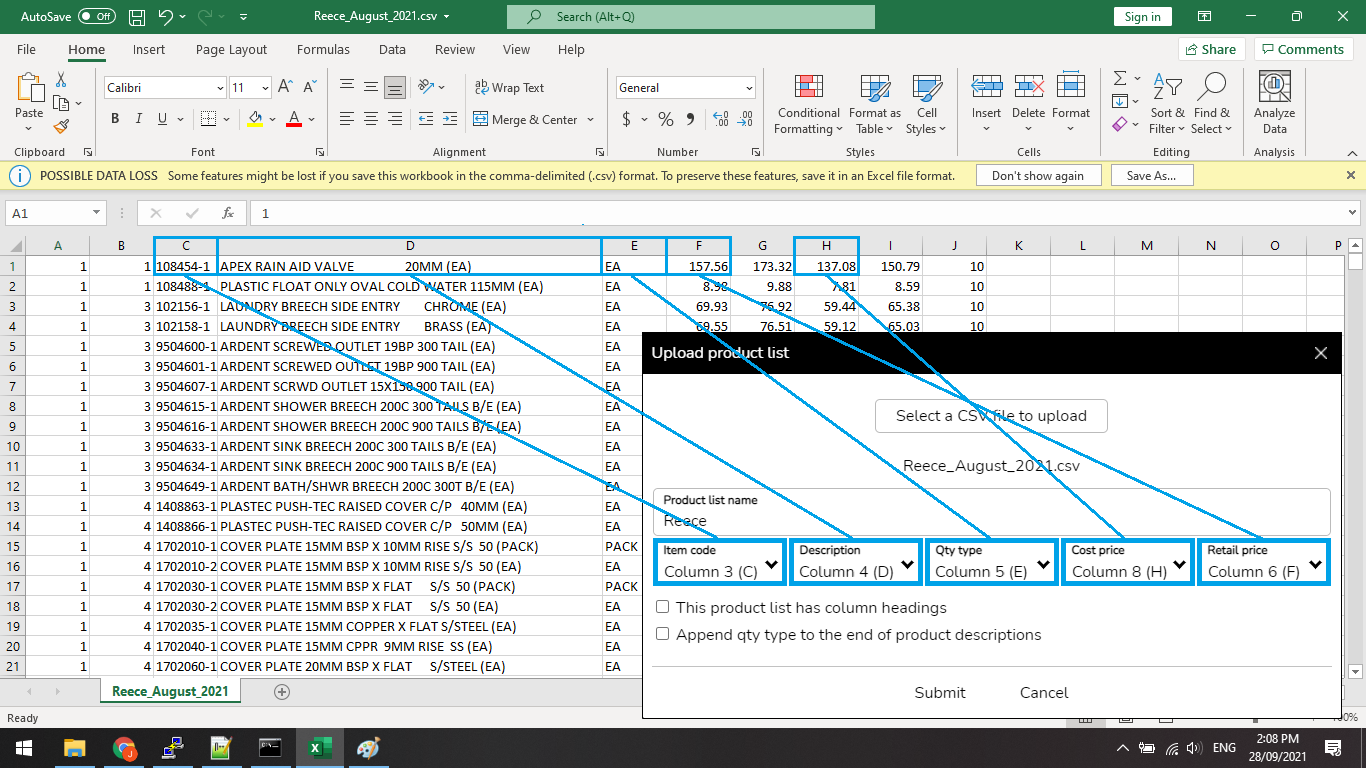
- If the CSV file you are uploading contains column headers (e.g. a text description of the column such as 'Part No.'), tick the 'This product list has column headings' option.
- If the description fields in the CSV file you are uploading do not contain a qty type (e.g. EA, 4pk, per meter), tick the 'Append qty type to the end of product descriptions' option.
-
Click 'Submit'.
After uploading a new product list, it's recommended that you add some items to a job and double check that everything looks correct, paying particular attention to the cost price and retail price fields.
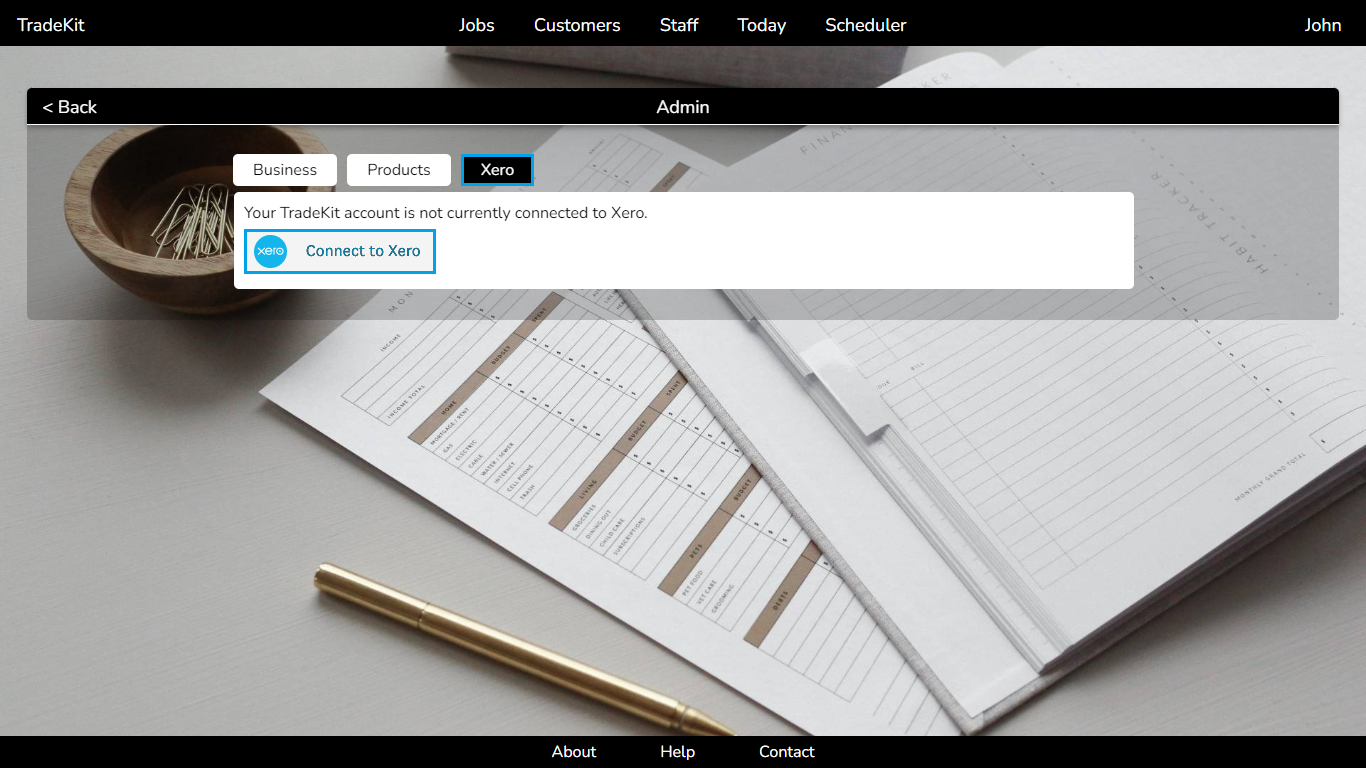
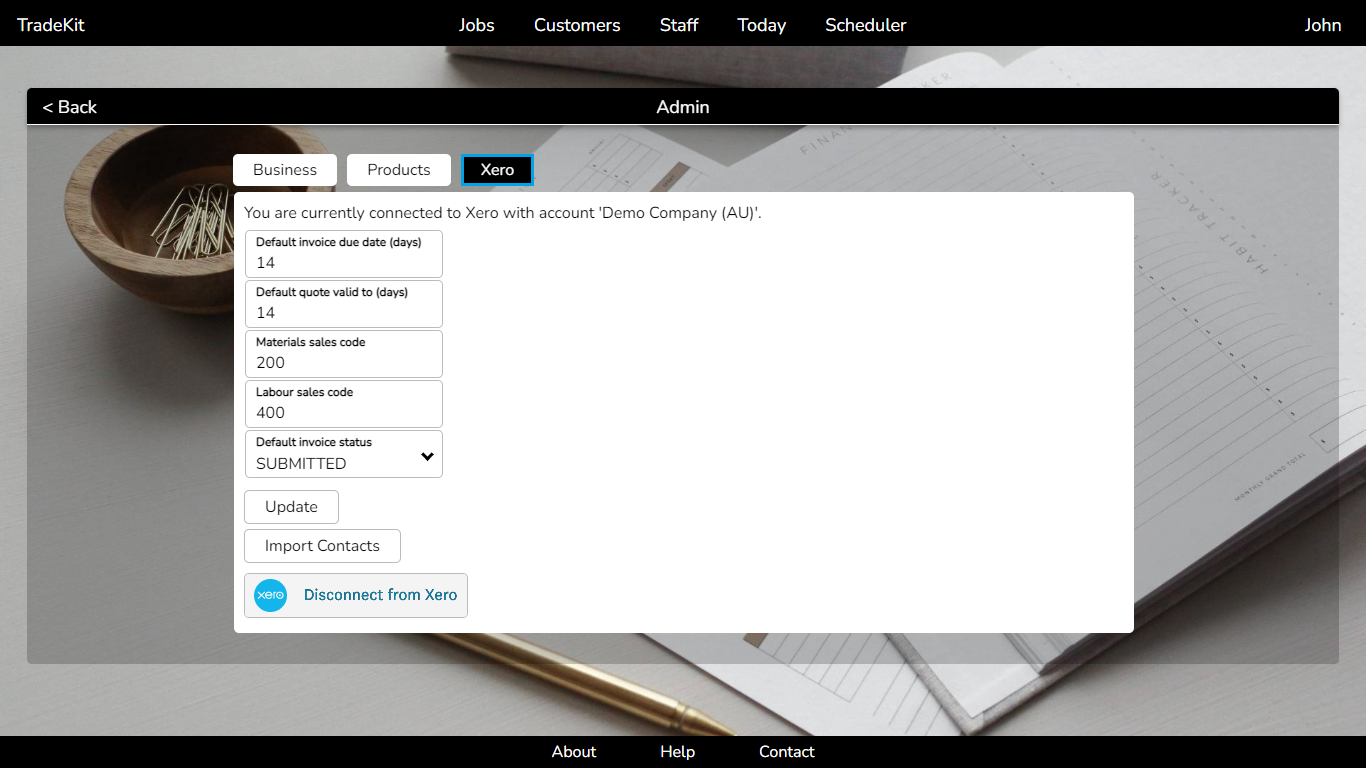
Connecting to Xero >
TradeKit integrates with Xero to allow you to seemlessly create and manage Xero invoices and payments. To connect your TradeKit account with Xero:
- Hover over the account menu and click 'Admin'.
- Select the 'Xero' tab.
-
Click 'Connect to Xero'.
-
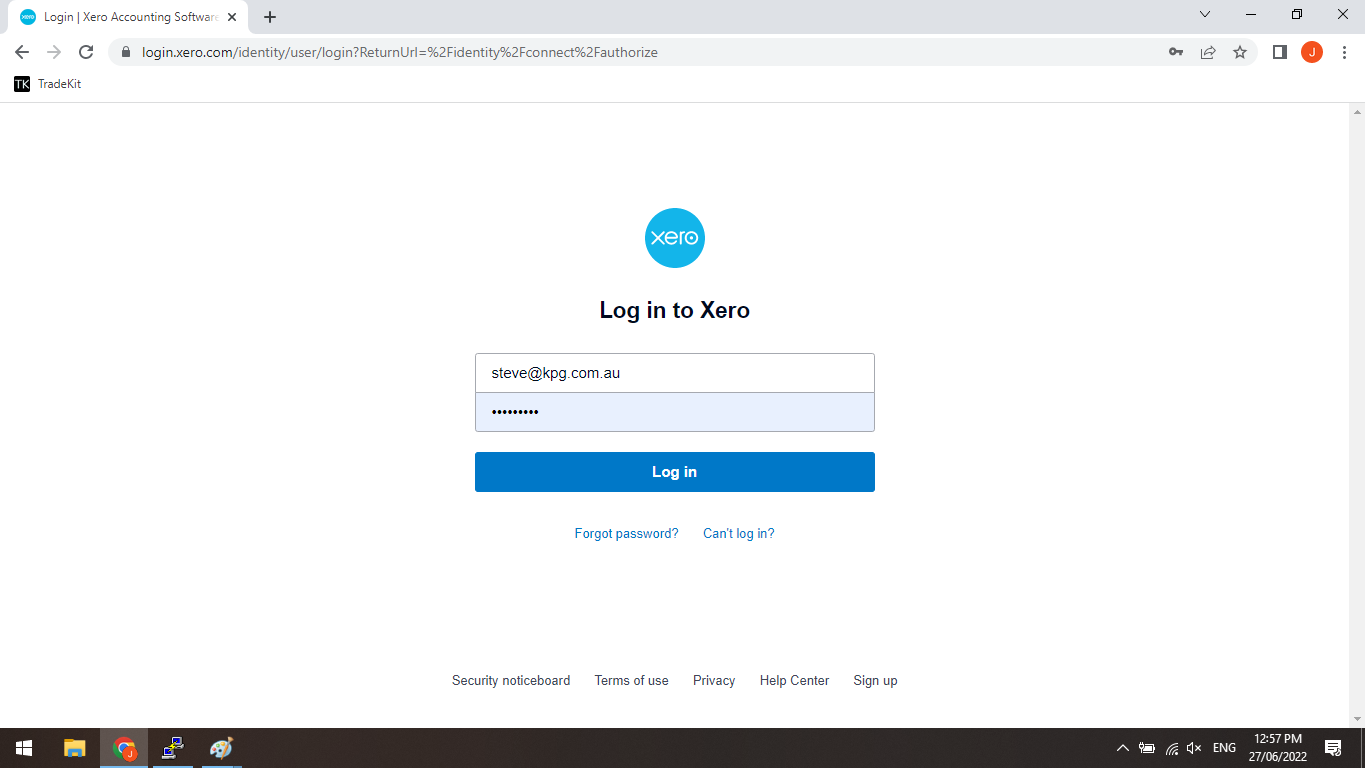
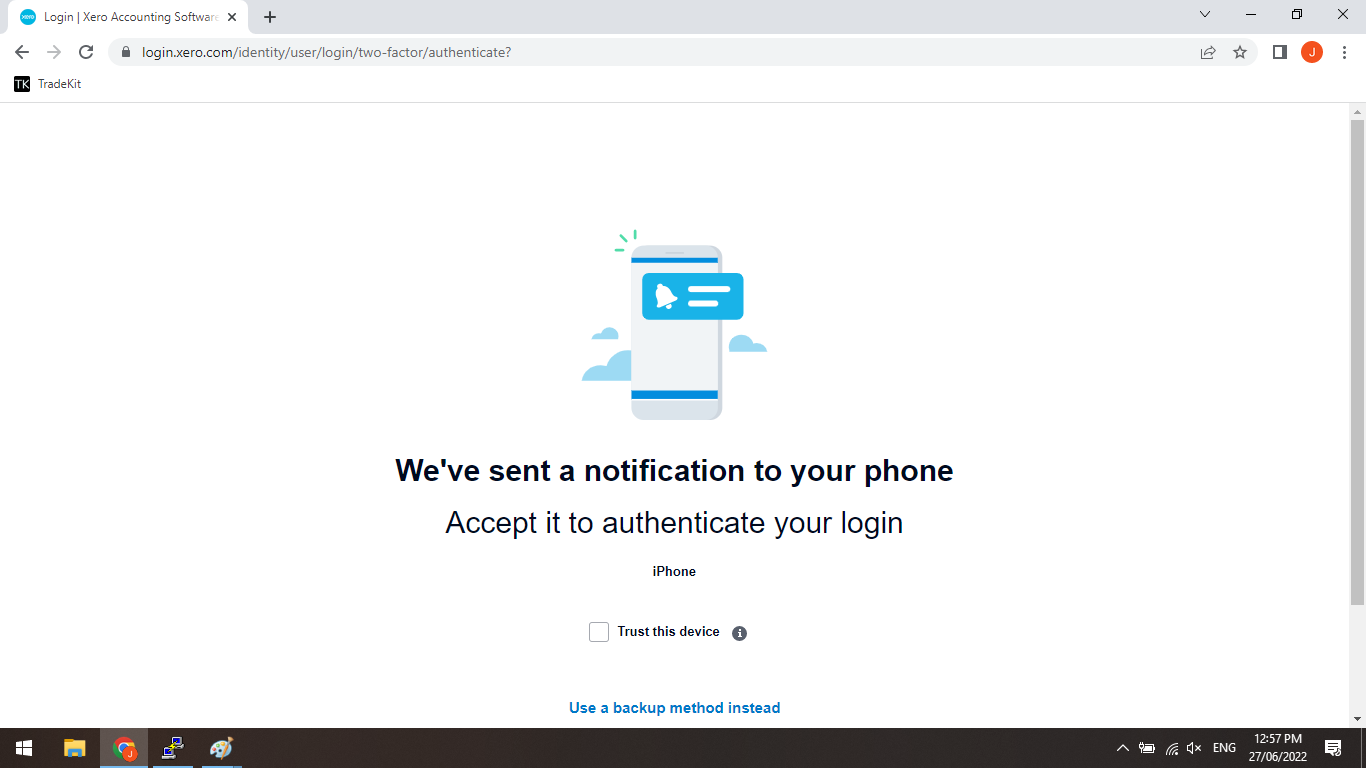
Enter your Xero email address and password and click 'Login'. If prompted to approve the login request by the Xero authenticator app on your phone, click approve.
-
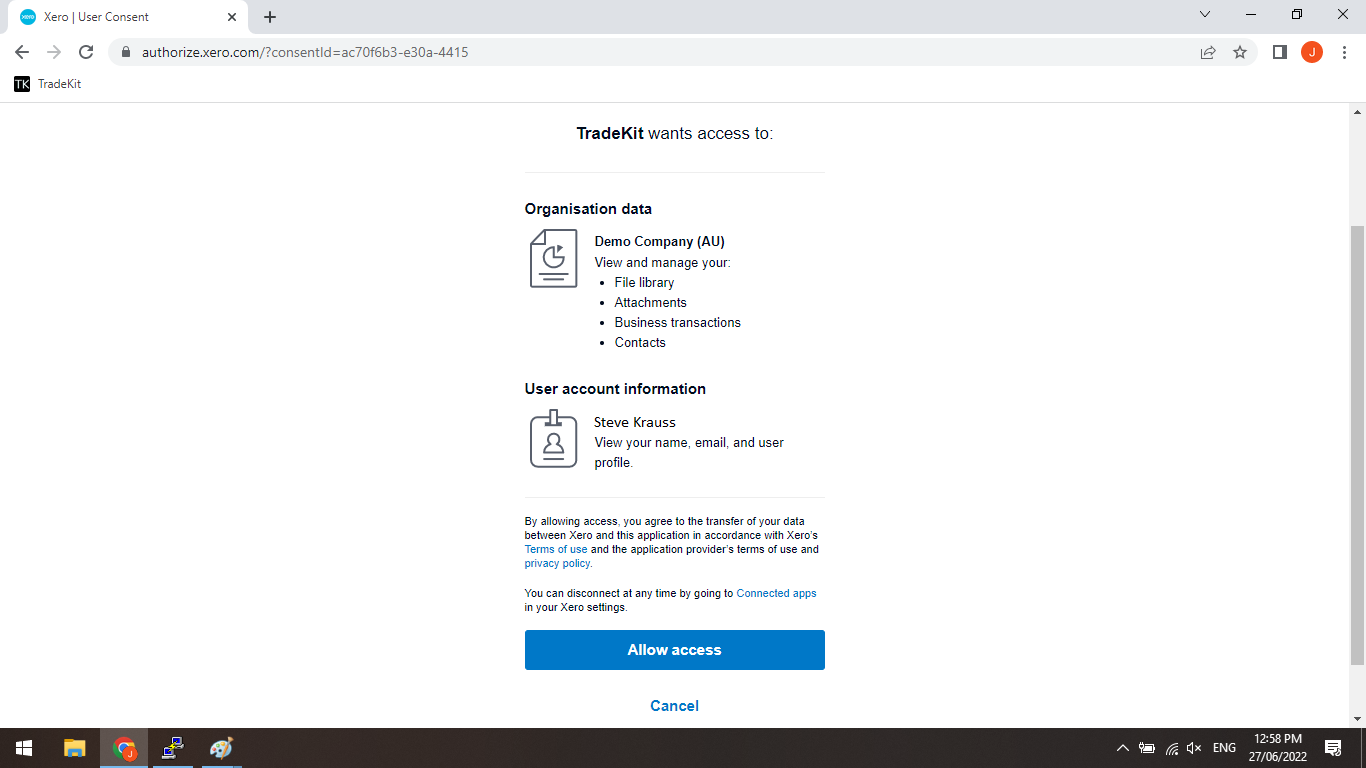
When prompted if you would like to allow TradeKit to access your Xero account, click 'Allow access'.
- Confirm that Xero is now connected by selecting the 'Xero' tab; a 'Disconnect from Xero' should now be visible.
-
It is recommended that you review the Xero settings and make sure they are appropriate for your business. Pay particular attention to the 'Default invoice status' as this determines whether or not Xero invoices and quotes need to be actioned in Xero before being emailed to customers.
- 'Materials sales code' and 'Labour sales code' are used by Xero to differentiate expenses - for more information, please refer to https://central.xero.com/s/
-
'Default invoice status' determines the Xero flow state for newly created invoices.
- 'DRAFT' corresponds directly with 'Draft' in Xero.
- 'SUBMITTED' corresponds with 'Awaiting Approval' in Xero.
- 'APPROVED' corresponds with 'Awaiting Payment' in Xero.
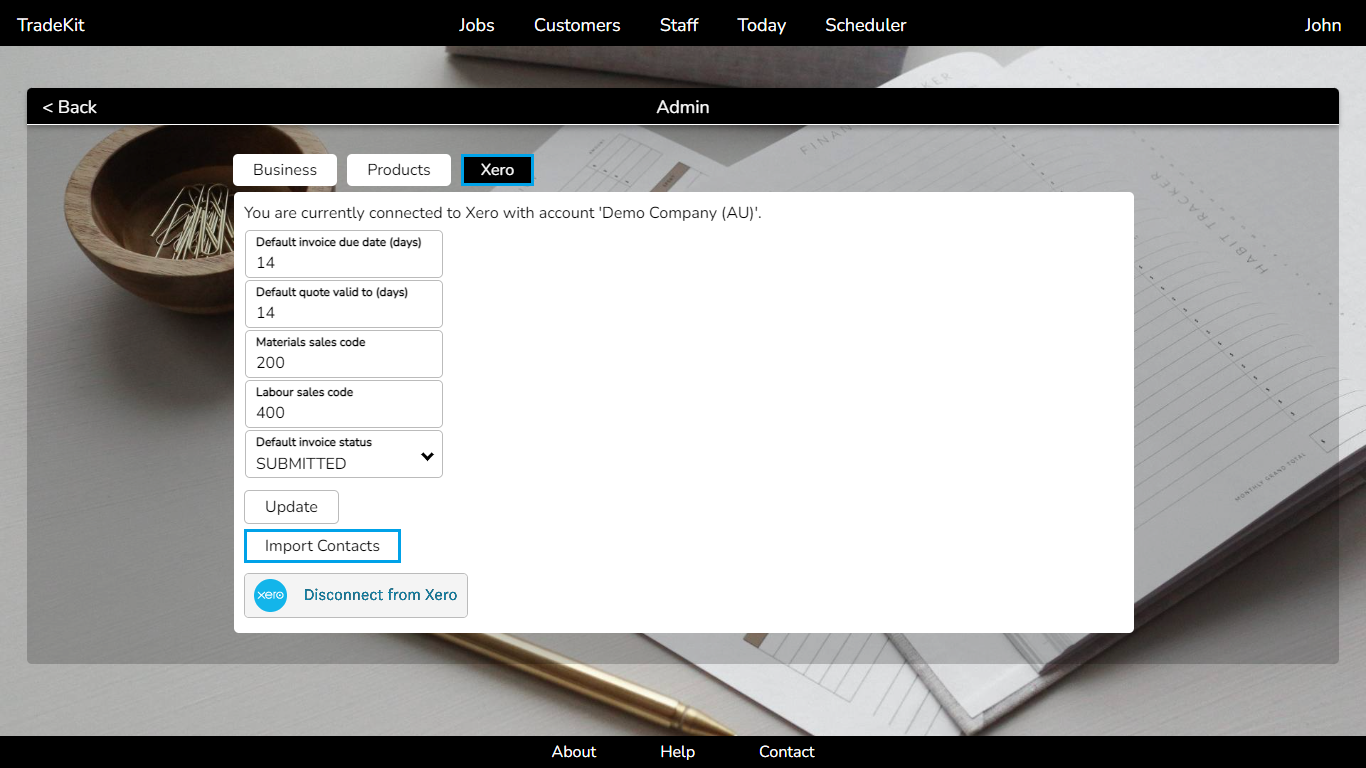
Importing contacts from Xero >
TradeKit allows for you to import all your existing Xero contacts to save you having to manually add them.
To import your Xero contacts into TradeKit:
- Hover over the account menu and click 'Admin'.
- Select the 'Xero' tab.
-
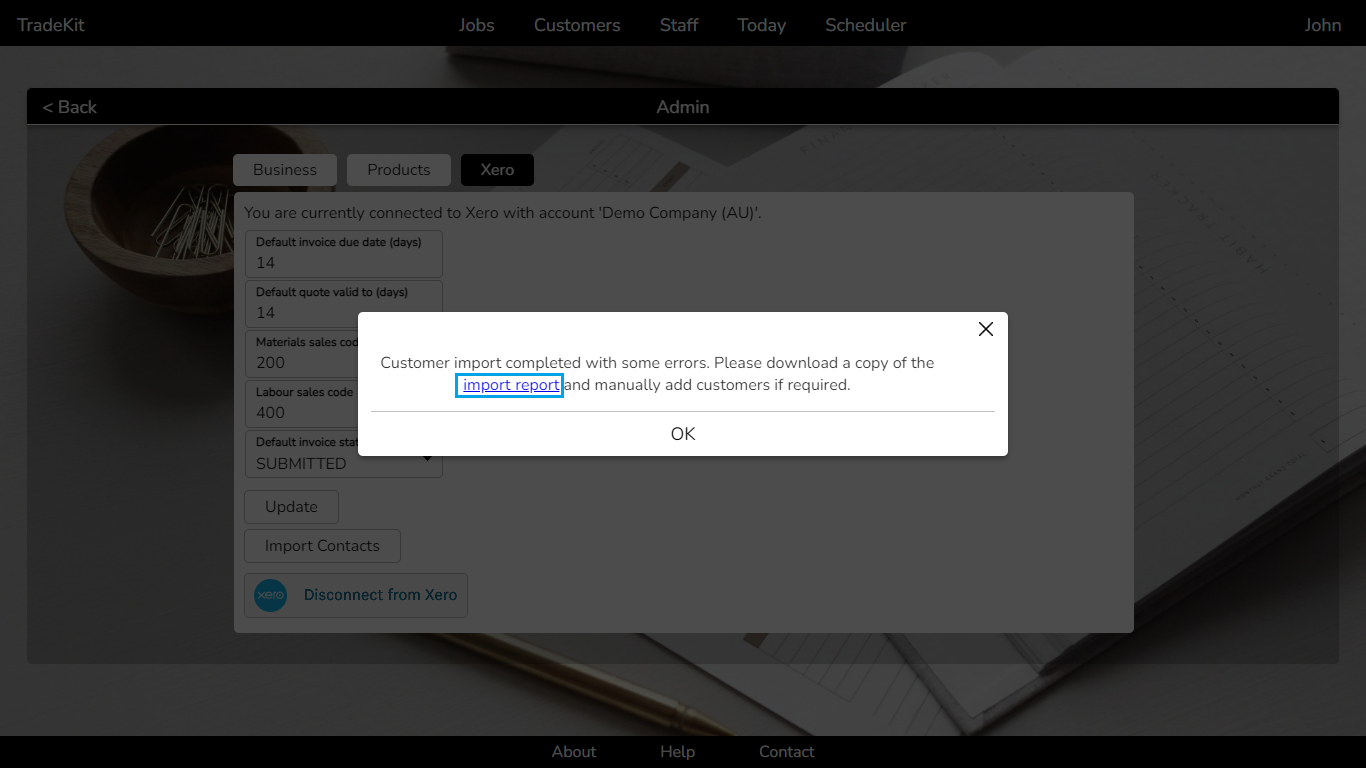
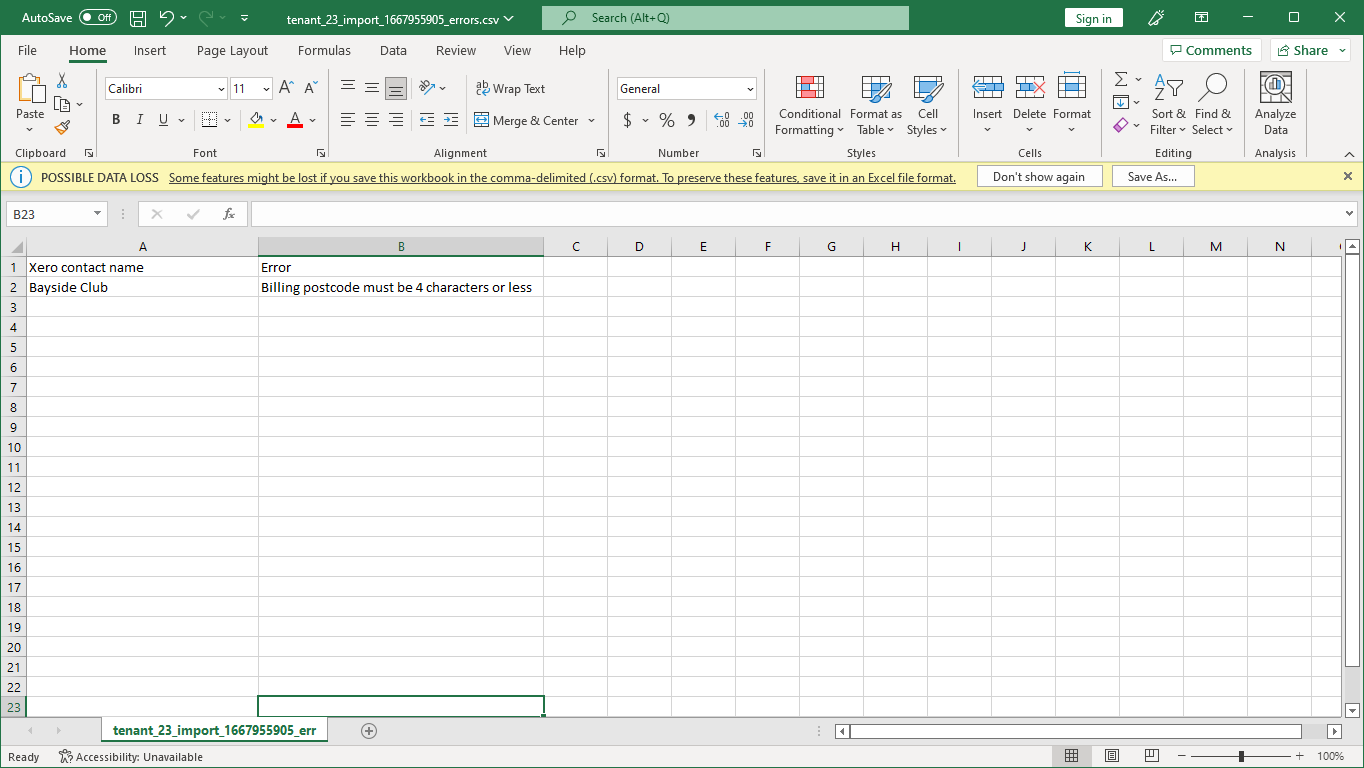
Click 'Import Contacts' and then click 'OK'.
-
If there are any errors during the import, you will be give the opportunity to download the 'import report'. This is a CSV file listing the contact that experienced errors and a brief error message. You will need to manually add any customers who appear on this report.
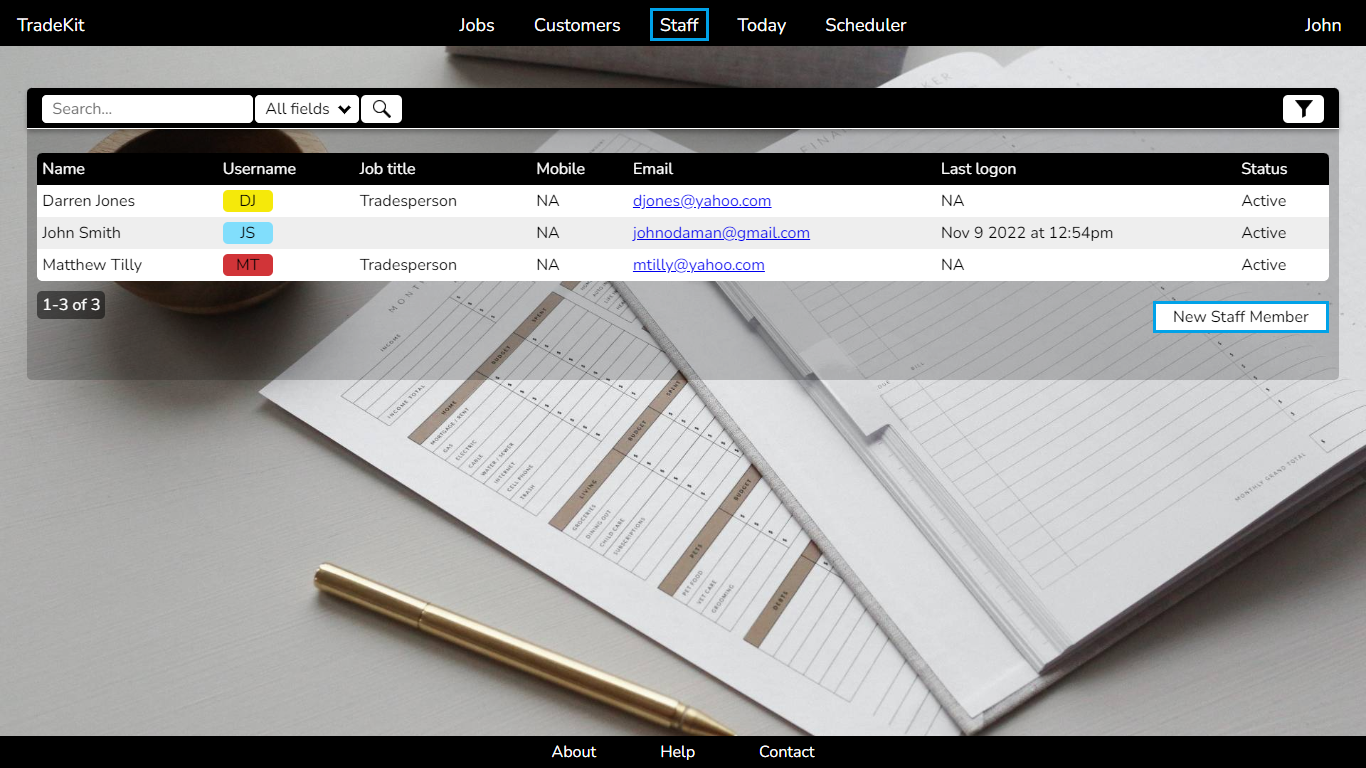
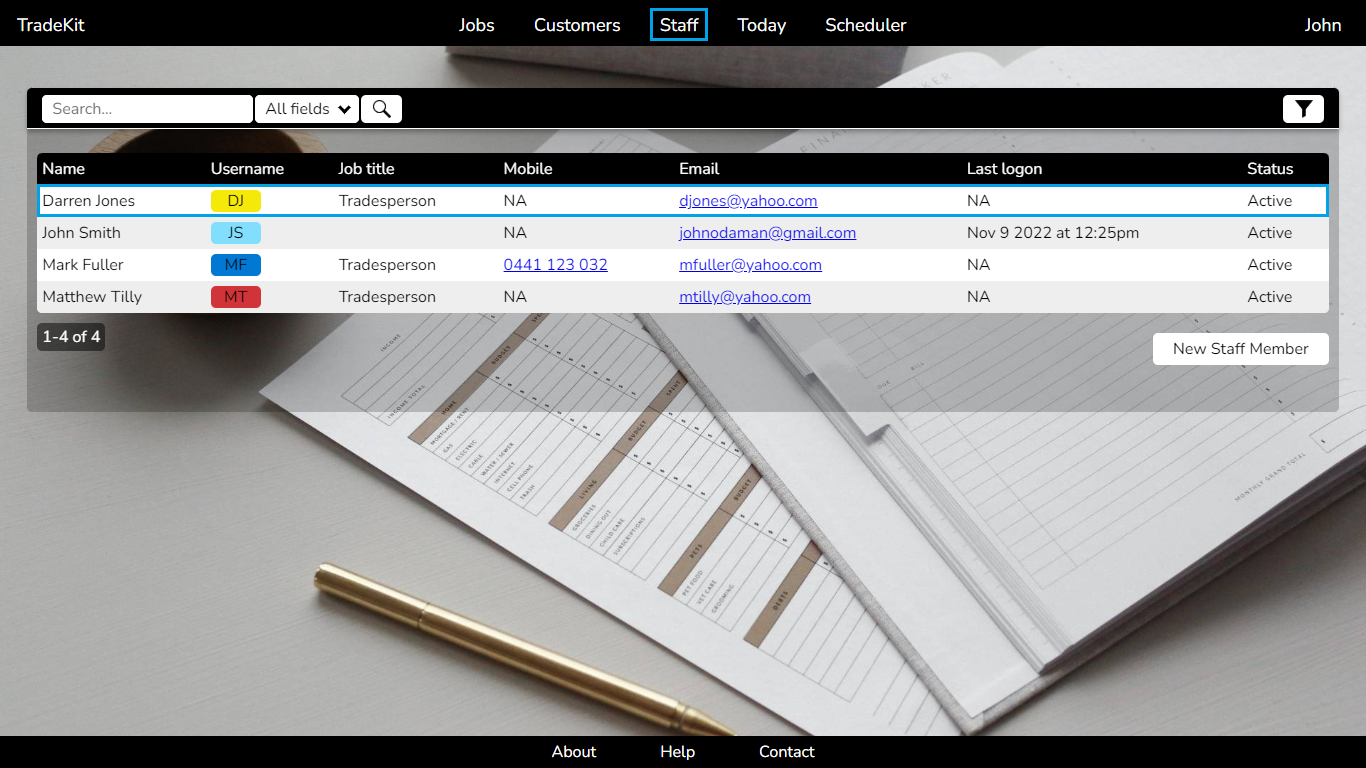
Adding staff members >
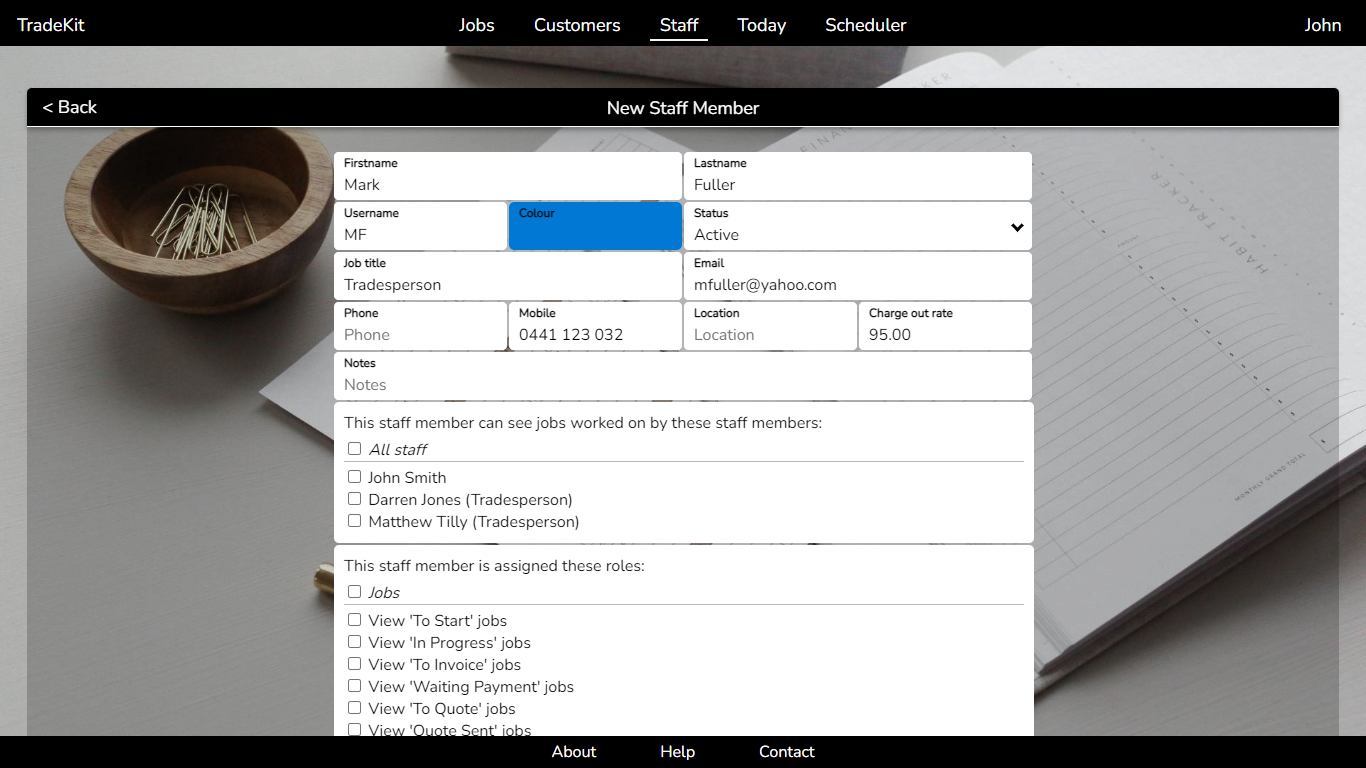
To add a new staff member:
- Click 'Staff' from the main menu.
-
Click 'New Staff Member'.
- Complete the required 'Firstname', 'Lastname', 'Username' and 'Email' fields. For 'Username' it is recommended that the staff member's initials be used.
-
It is also recommended that the 'Mobile' and 'Charge out rate' fields be completed. The 'Charge out rate' value will be used when adding labour to a job.
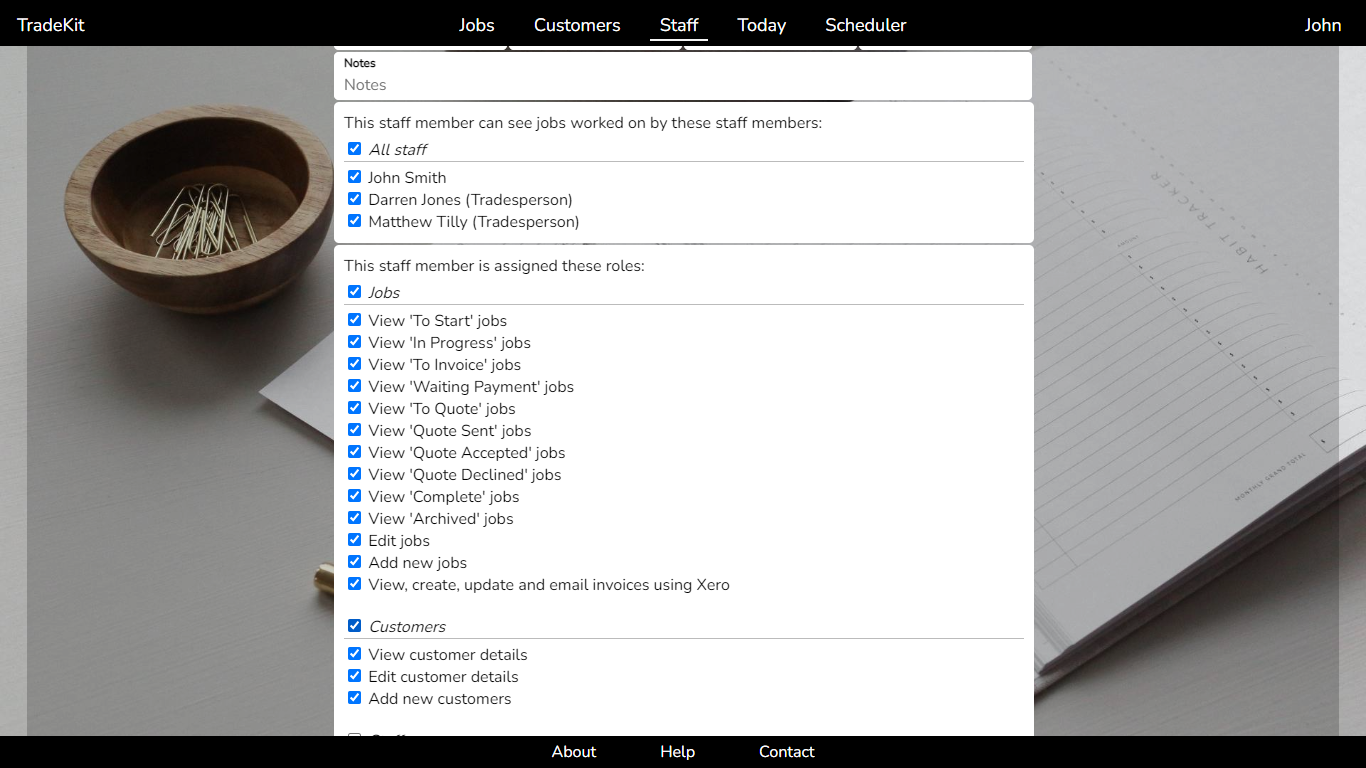
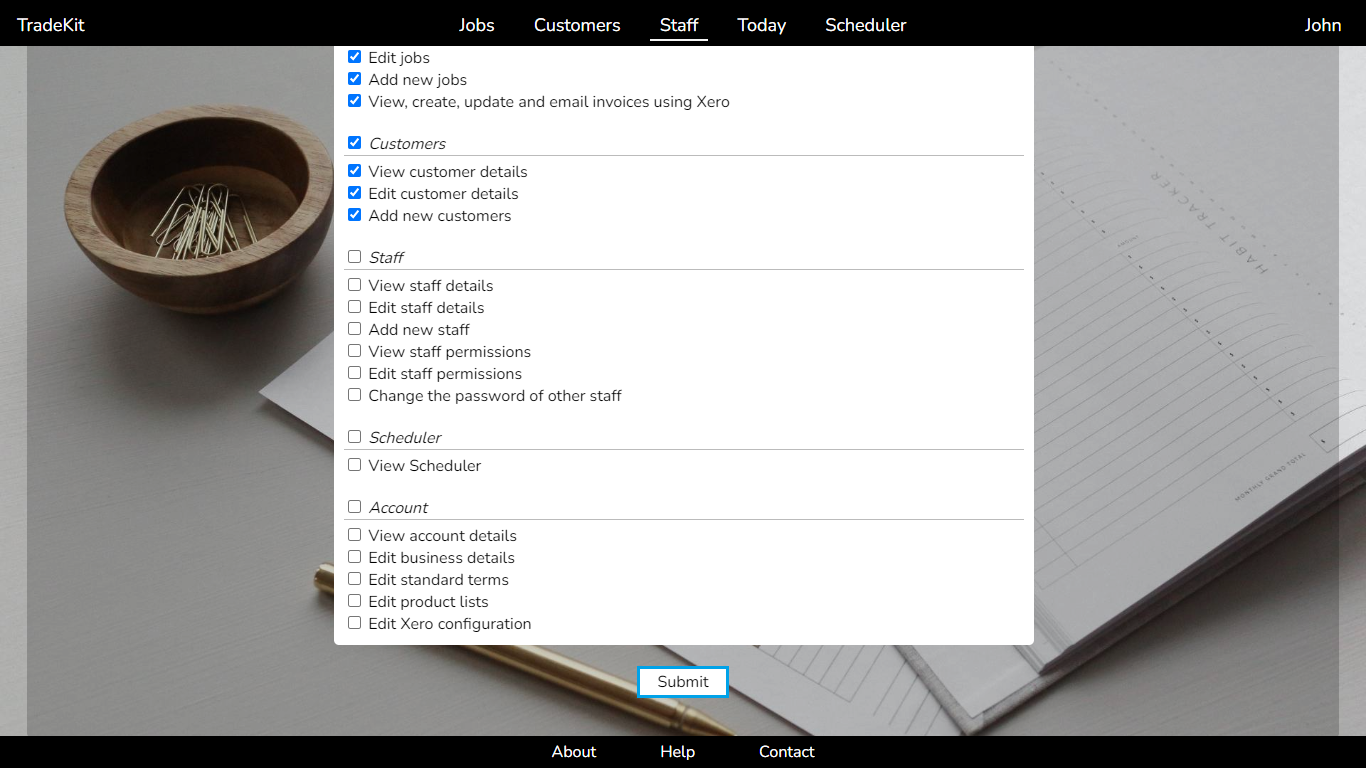
- Tick the permissions that you would like the staff member to have. For a tradesperson, this will normally be 'All Staff', 'Jobs' and 'Customers' options.
-
When finished click 'Submit'.
After adding a new staff member it is important that you update the permissions for existing staff members, so that they can see jobs worked on by the newly added staff member.
To do so:
-
Click 'Staff' from the main menu.
- Click on an existing staff member and then click 'Permissions'.
- Tick the permission to see jobs worked on by the newly added staff member.
-
When finished click 'Update'.
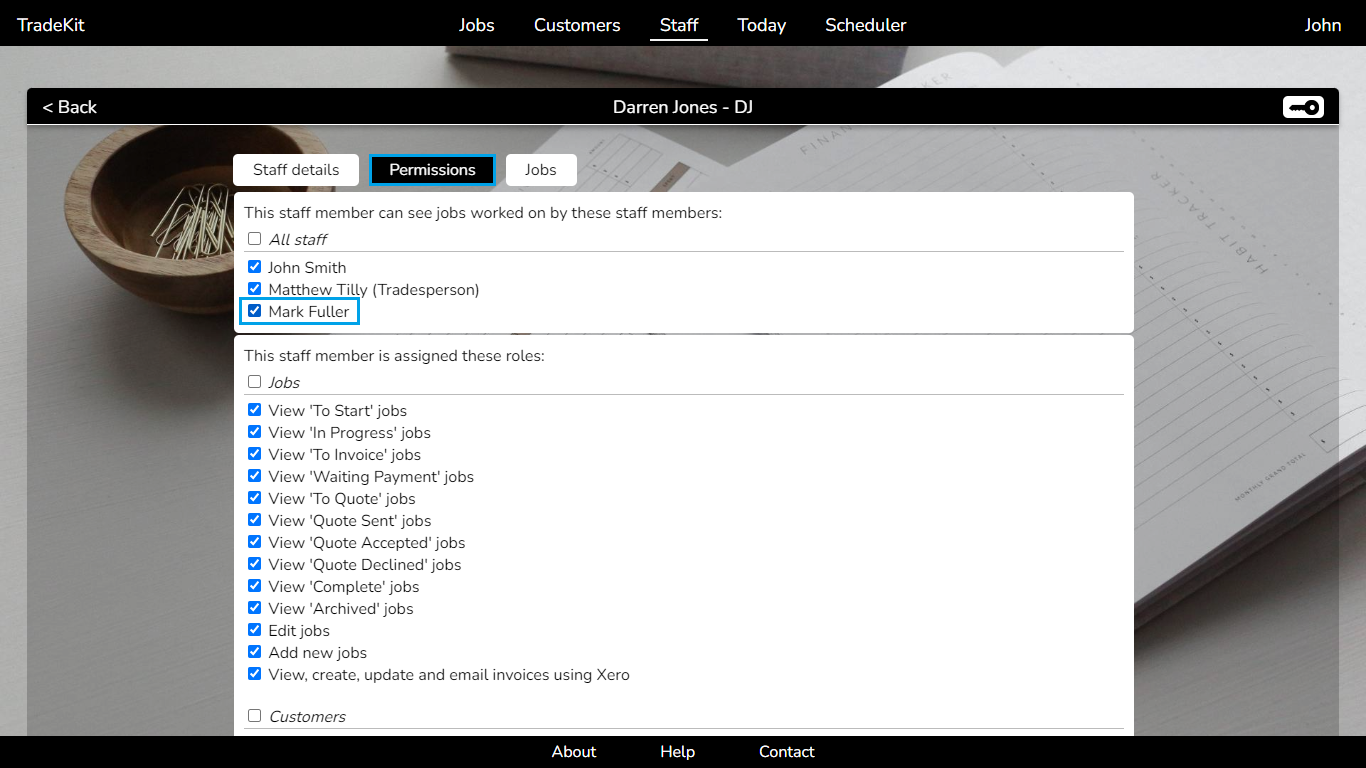
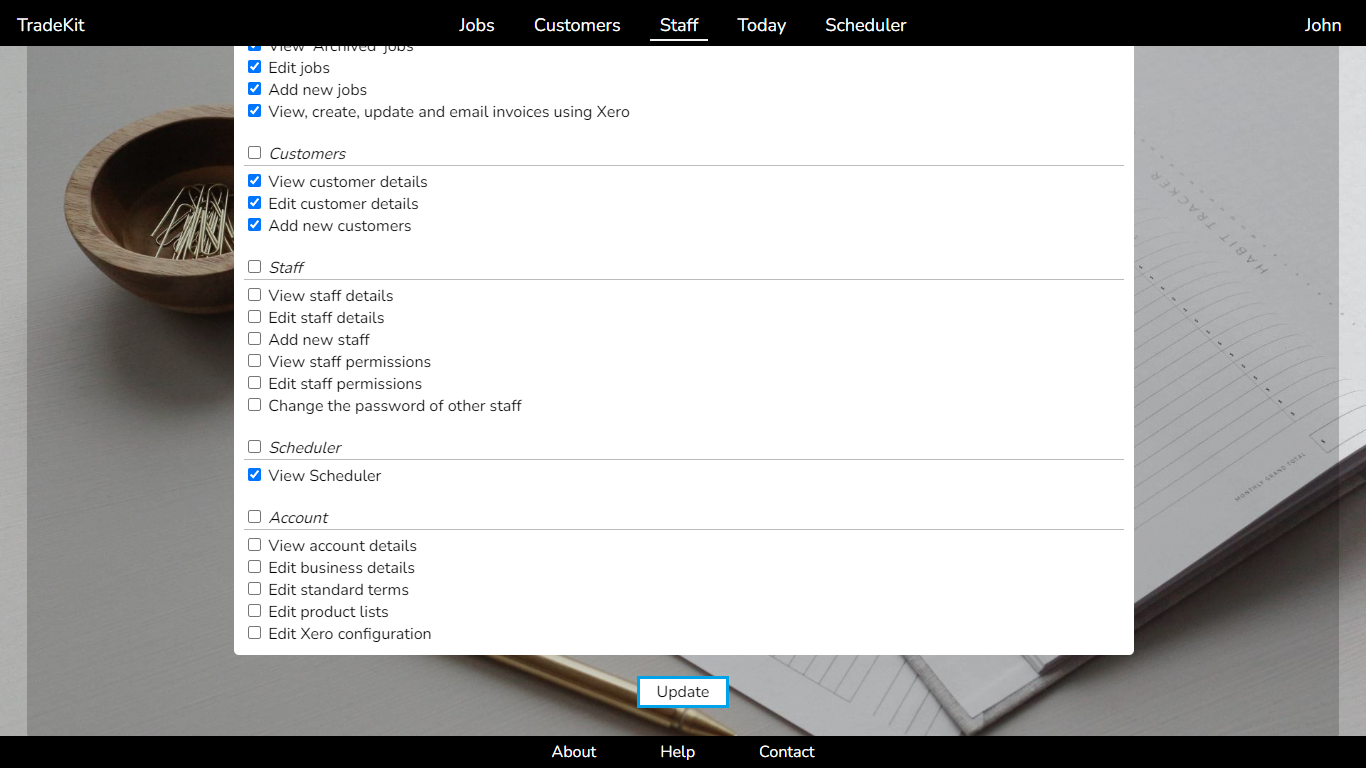
- Repeat the above steps for all existing staff members.